Showing posts with label needle felting. Show all posts

Thursday, February 5, 2015

Making a Birthday Crown


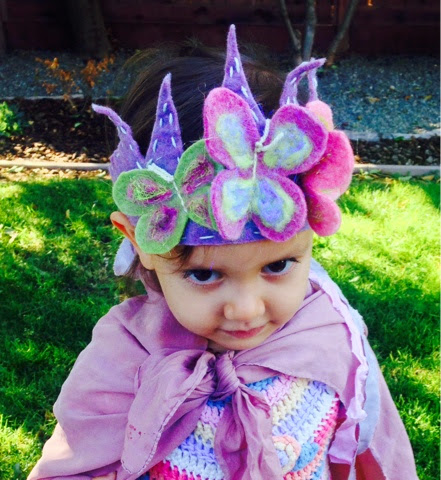
Linden loves crowns, so we made her one for her birthday and one for play. 

We started with plant-dyed wool felt, roving and embroidery thread from Mama Judes. 

Drawing a fairy-like, curved-pointed design with chalk, we created the look for the base piece.

Embroidery thread was used to hold together butterflies and the crown bases and also as embellishment.

Our Syrendell plant-dyed silk ribbons were seen onto the ends of the crown base to tie in a bow at the back of the head. Using ribbons allows the crown size to be adjustable.


Next, we need felted wools roving and a bit of Angelina sparkle onto the wool butterflies.


The crown is complete! We then made a crown with different colors and flowers/leaves.


Saturday, November 15, 2014

Linden's 3rd Birthday


Our baby Linden turned three in October! Seems like yesterday that she was born blissfully at home in the waterbirthing tub with family present.

We used cuttings from the yard for simple decorations.

Linden loves butterflies! We made a crown of butterflies out of plant-dyed felt and roving from Mama Judes on Etsy. Crocheted bunting was made by Jennifer, originally for our 20th anniversary celebration. The colors were perfect for the butterfly birthday!

Extended family came to celebrate.

Kids had handmade fairy bubble wands.

Kids and adults needlefelted butterflies and dragonflies.


Our oldest son and his girlfriend made a beautiful "3" cake.

Sweet Linden Faye. Crochet pattern for her top by Chez Plum. Silk Cape dyed with Logwood from Griffin Dyeworks.

Friday, November 26, 2010

Felting a Winter Queen Tutorial


O Winter Queen!
Thy crown silver and bright
Snowdrifts spiral from your cape

O Winter Queen!
Thy dress blue, purple, white
Long hair curls at the neck's nape

Give us light!
Wisdom and sight!
O Winter Queen
Supplies
1.  White wool roving (corriedale, romney, other)
2.  White wool locks for hair
3.  Blue, purple, flesh-tone or other colors of wool roving
4. Angelina fiber for sparkle
5.  Tin foil
6.  Needle felting needles and foam base


Step One - Prep The Fiber
If needed, card your wool fiber so that it is easy to needlefelt. 


Step Two - Body  With one piece of white roving, wrap around and around until you have a long cylinder shape, a bit longer than the height that you want your queen to be.  Needlefelt until it feels connected.  The body does not have to be felted solid unless you prefer it that way.  Tie a piece of yarn at the neck and needlefelt the head portion into a more spherical shape.  Turn the body upside down and needlefelt the base to be a bit wider so that it will stand.  With a wisp of flesh-tone roving, wrap the head and gently needlefelt in place.

Step Three - Cape and Dress
Pull apart wisps of white roving for the cape.  Each piece will be needlefelted into the neck area, drape downward (lightly needlefelt to the body), and then swirl outward from the body in snowdrifts.  To make the ends spirl/swirl, pinch the end with your fingers and roll the end in one direction, then needlefelt to hold the shape.  Add as many of these cape pieces as you want around the sides and the back.  You might want the cape wool to be a different wool or shade of white than the body.  With wisps of purple and blue roving, spiral and layer along with white on the dress portion that shows in the front under the cape.  A circle brooch may be made by twisting slender pieces of roving and then spiraling around into a circle.  Add wisps of angelina fiber as you felt for an icy sparkle. Needlefelt until you feel that everything is attached and shaped the way that you like it.

Step Four - Hair
Wool locks are wonderful and provide instant curly hair!  Layer these on the top of the head and needlefelt into the head and neck and (carefully) into the cape, as needed.  In our pictures, we had slender strips of wool that we layered and twisted instead of locks.  You can also take roving, pull into strips, twist, and create your own hair.
Step Five - Crown
With tin foil, fashion a crown by cutting and folding to fit the head of the queen.  A tin foil scepter is another option.

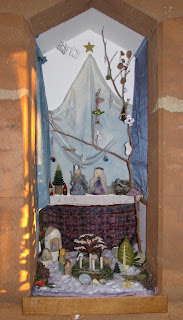
Continue to needlefelt with a smaller needle, all of the finishing touches, including shaping hair, head, body and cape.  Make sure that the base is balanced so that she will stand on her own.  Now, place her in your nature table, showcasing the coming of Winter!  Sing songs, write stories and read poems to her and thank her for bringing wisdom and light during this darker time of the year.

Wednesday, October 20, 2010

Felted Slippers eBook

Our eBook on how to felt slippers is now available here on our blog (to the left) and in our Etsy shop!  Learn how to make felted slippers that may be used as nighttime slippers, indoor shoes, or outdoor boots.  A wonderful family project!

Tuesday, February 3, 2009

Felting at Syrendell


We love to felt! All of us do some sort of wet or needlefelting. We use the clover 5-needle tool and we also use single needlefelting needles.

Our wax crayons have been in a basket for months, but they tend to get dinged up. Joey wet felted a nice lining for the basket out of some beautiful merino wool strips.


Lately, we've been needlefelting outfits for finger puppets. Joey has created an adorable series of finger puppets called the "Seasonal Children", featuring Spring, Summer, Autumn and Winter. She needlefelted some beautiful Math Gnomes with Mommy for little brother Wilson for Christmas. The gnomes sleep at night in a box with felted lining!

During Christmas, we worked on needle felting balls and turning them into ornaments!

For Valentine's day, Joey felted some small hearts out of some pink wool and sparkle angelina fibers that she carded. She added a pin to the back of each heart and then felted a piece over the pin backing to hold. These will be precious gifts for her cousins and friends from her dance classes!

We created an Acorn Family for our Seasonal Spot (aka, "nature table") by wet felting and then needlefelting clothes for the wooden finger puppets. Each family member received an acorn cup hat!


Our sweet Gnomy has boots, beard and hat, felted by Ricky and Mommy. He is often seen in our Seasonal Spot, or near a seasonal wreath.


Everyone enjoys needlefelting fruits and veggies for our little grocery store. After playing "store", we often take the bounty to the wood stove that Daddy built for Wilson for Christmas and prepare meals.


Wilson loves playing with his rainbow wood home blocks. The Acorn Family fits nicely in the house! Wilson helped Mommy felt a bowl and some tiny fruit for the table this week.


Since we love to spin and don't like to waste, all fiber scraps go into baskets. When it's time to felt, the baskets are a treasure trove of colors and textures, just waiting to become something amazing!