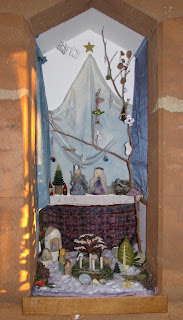
O Winter Queen!
Thy crown silver and bright
Snowdrifts spiral from your cape
O Winter Queen!
Thy dress blue, purple, white
Long hair curls at the neck's nape
Give us light!
Wisdom and sight!
O Winter Queen
Supplies
1. White wool roving (corriedale, romney, other)
2. White wool locks for hair
3. Blue, purple, flesh-tone or other colors of wool roving
4. Angelina fiber for sparkle
4. Angelina fiber for sparkle
5. Tin foil
6. Needle felting needles and foam base
If needed, card your wool fiber so that it is easy to needlefelt.
Step Two - Body With one piece of white roving, wrap around and around until you have a long cylinder shape, a bit longer than the height that you want your queen to be. Needlefelt until it feels connected. The body does not have to be felted solid unless you prefer it that way. Tie a piece of yarn at the neck and needlefelt the head portion into a more spherical shape. Turn the body upside down and needlefelt the base to be a bit wider so that it will stand. With a wisp of flesh-tone roving, wrap the head and gently needlefelt in place.
Pull apart wisps of white roving for the cape. Each piece will be needlefelted into the neck area, drape downward (lightly needlefelt to the body), and then swirl outward from the body in snowdrifts. To make the ends spirl/swirl, pinch the end with your fingers and roll the end in one direction, then needlefelt to hold the shape. Add as many of these cape pieces as you want around the sides and the back. You might want the cape wool to be a different wool or shade of white than the body. With wisps of purple and blue roving, spiral and layer along with white on the dress portion that shows in the front under the cape. A circle brooch may be made by twisting slender pieces of roving and then spiraling around into a circle. Add wisps of angelina fiber as you felt for an icy sparkle. Needlefelt until you feel that everything is attached and shaped the way that you like it.
Step Four - Hair
Wool locks are wonderful and provide instant curly hair! Layer these on the top of the head and needlefelt into the head and neck and (carefully) into the cape, as needed. In our pictures, we had slender strips of wool that we layered and twisted instead of locks. You can also take roving, pull into strips, twist, and create your own hair.
Step Five - CrownWith tin foil, fashion a crown by cutting and folding to fit the head of the queen. A tin foil scepter is another option.
 Continue to needlefelt with a smaller needle, all of the finishing touches, including shaping hair, head, body and cape. Make sure that the base is balanced so that she will stand on her own. Now, place her in your nature table, showcasing the coming of Winter! Sing songs, write stories and read poems to her and thank her for bringing wisdom and light during this darker time of the year.


5 comments:
Your winter queen is oh so pretty. Might try and make one myself when i have the chance. Thanks for sharing.
She is indeed very pretty!! Thanks for sharing and I wish you will have a nice wintertime !
What a fun tutorial, Jennifer! Love how she turned out and she looks great with King Winter! Will have to try this style of needlefelting :)
Have a lovely holiday season and I hope to see your amazing family in 2011!
Hugs,
Jen
Thanks for visiting and leaving such a lovely comment on my blog, Jennifer. And what a treasure is your space here, a feast for the eyes and so much inspiration! I added you to my reader so not to miss a post!
Luciana
What sweet, enchanting magic you have captured!
Post a Comment